Before you start
- The product must have a recipe that is ready for work orders. See Making a manual recipe.
- For a product printed per school title, the customer, school and title must exist. See Titles: from Work Order to stock.
Steps
Go to Manufacturing Activity Control and click Work Order.
Click the green Add Work Order.
In Select Assembly Product, pick the work order type on the left. They are grouped:
- Rims: Machine Ruling, Manual Ruling and Print Ruling.
- Cards: Card Printing, Card Lamination, Art Paper Printing and Art Paper Lamination.
- School: Note Book, Register, Home Work Diary, Drawing Copy, Graph Copy, Scrap Book, File, Pad, Parcha, Sketch Book, Ring NB + REG and Gata NB + REG. Choose Standard for products you already have, or Custom to choose the options yourself (for example sheets, paper and weight) for a one-off product.
- Others: Manual.
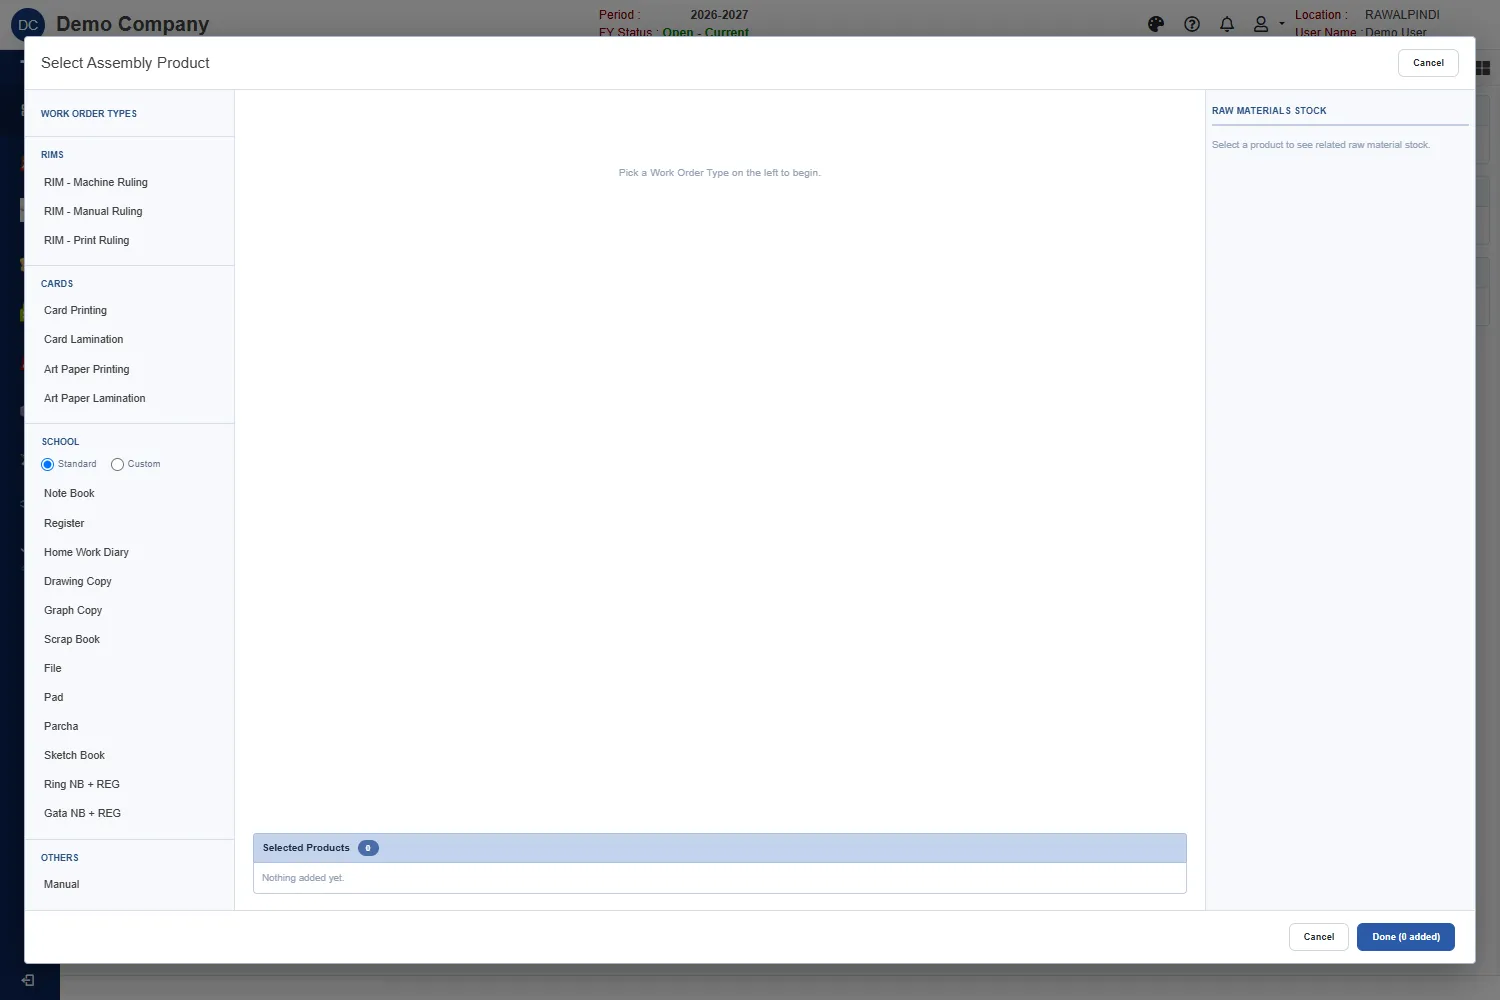
Choosing the work order type The products of that type appear. Type in the search box, or use Category, Type and Group to narrow the list. Enter the Order qty and click + Add. A product with variants shows Select →: click it, then add the variant you need.
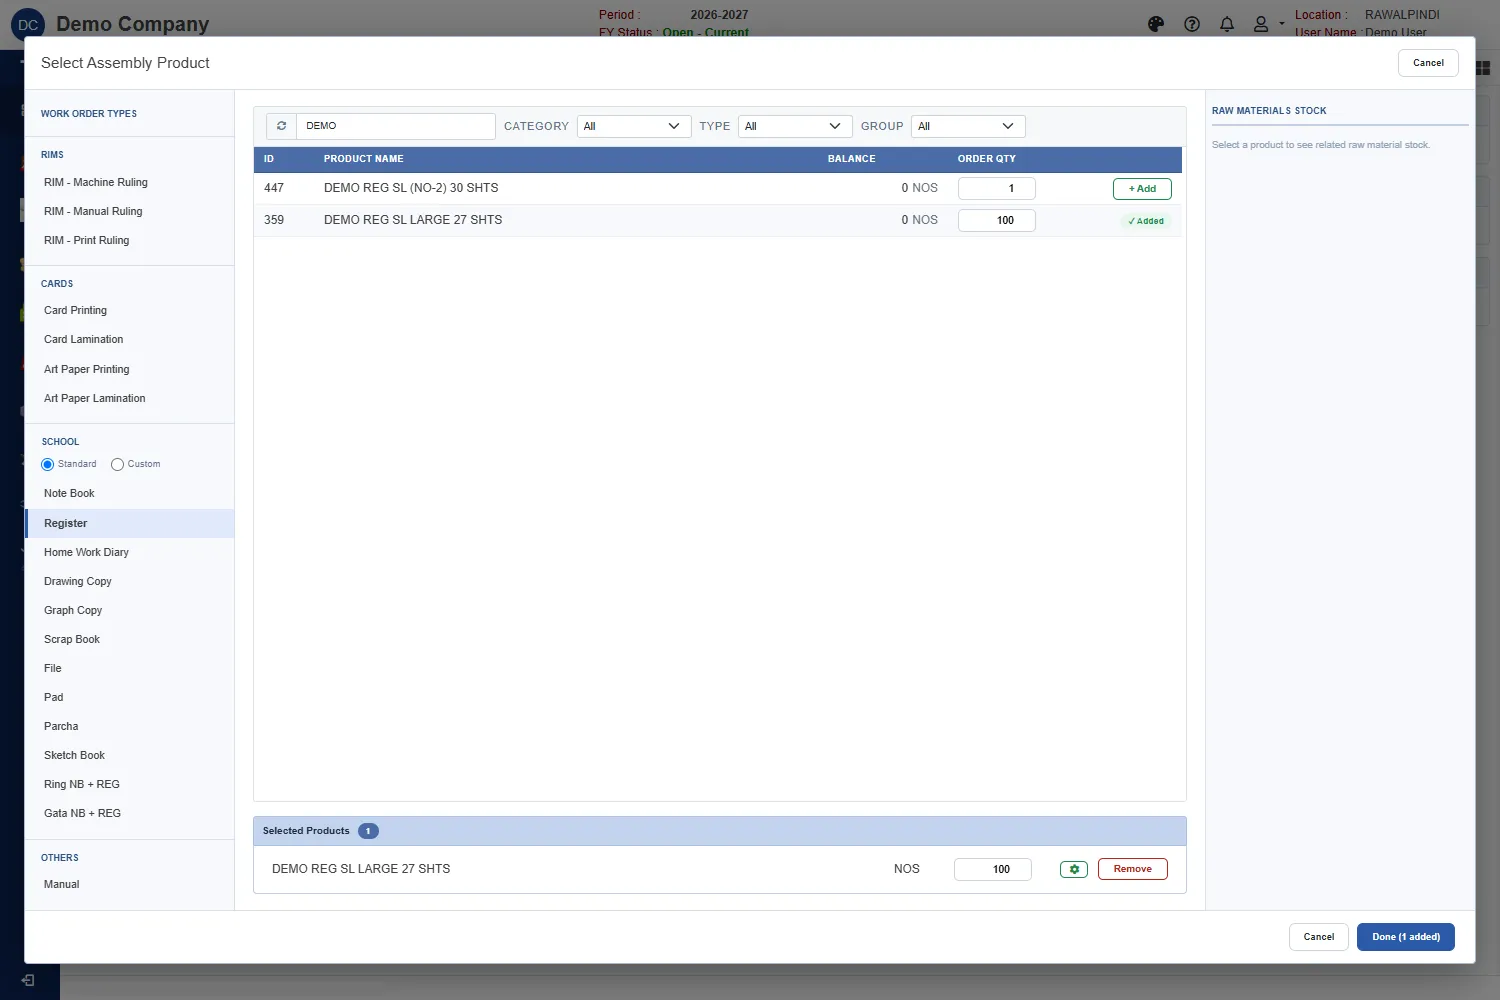
Adding a product to the order The product appears under Selected Products with its quantity. The green gear opens its options. Remove takes it out. Add more products if you need them, then click Done.
The order form opens. Fill it in:
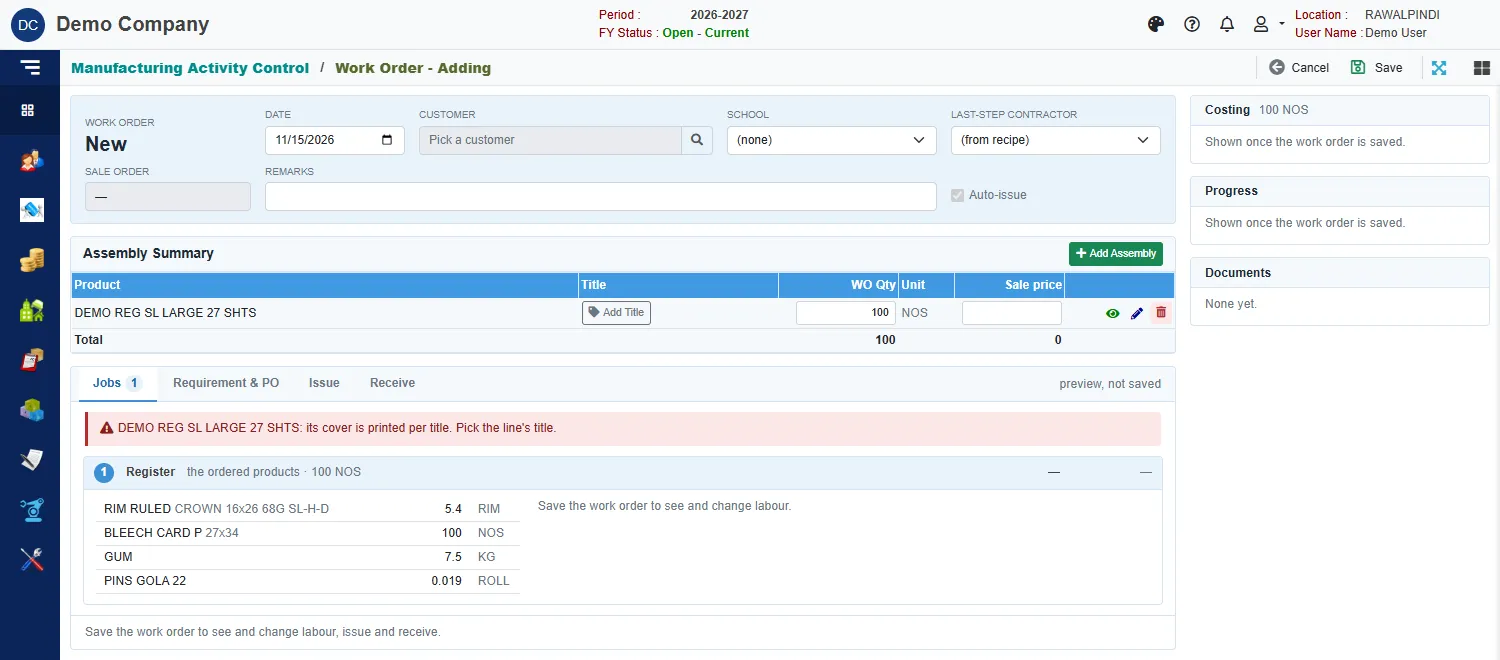
A new work order, before saving Customer: click the search button and pick the customer. Pick it before you choose a title, because titles belong to a customer.
Title: for a product printed per title, click Add Title on the line. Choose the customer, the WO Type and the School, narrow by Size if you need to, click the title and click Select.
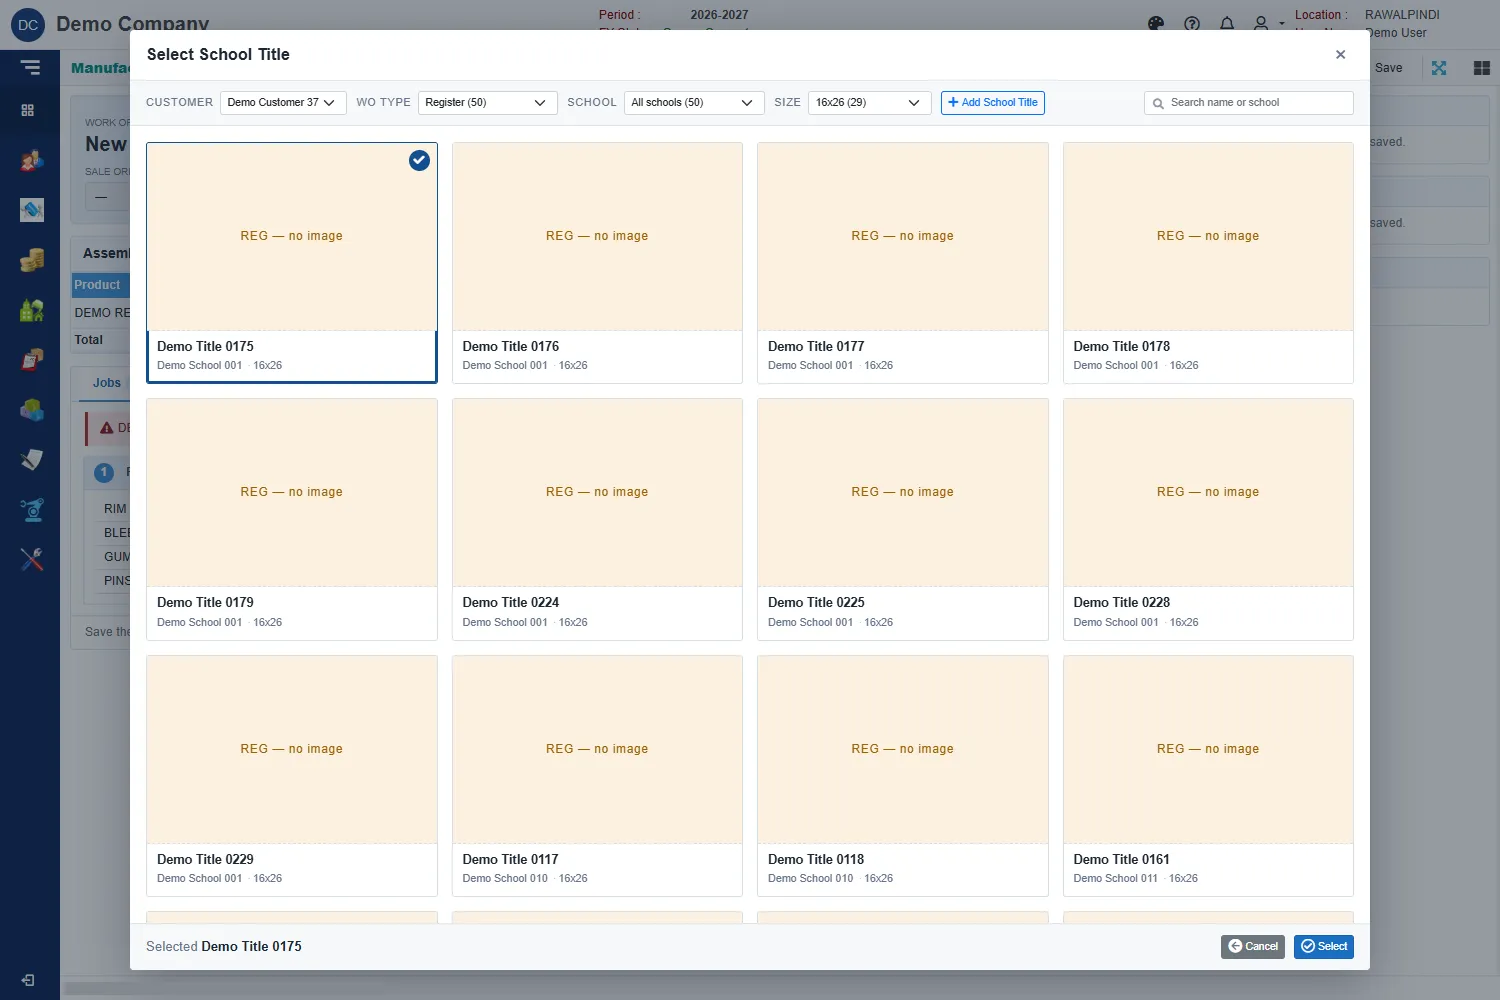
Choosing the title WO Qty and Sale price on each line.
Last-step contractor: leave it on (from recipe) to use the recipe's contractor, or pick one.
Look at the Jobs tab. It shows a preview, not saved of the jobs and materials the order will have. Check the quantities.
Click Save at the top right.
A green message confirms it, for example Work order WO-131-2627-000016 created with 2 job(s). The order now shows its labour, requirement, issue and receive tabs, and the costing and progress cards.
When you save an order for a customer, a sale order is created too, and its number appears in Sale order. A line with no sale price is given a proposed price of cost plus 40%. Change it on the line or in the Sale price / NOS box.
Cards and titles
A card is printed and laminated for each title, so a title on the order gets its own card jobs. The card job's materials are handed to the next job when the card is received.
Messages you may see
| Message | What to do |
|---|---|
| Add at least one line. | Add a product before you save. |
| Every line needs a quantity above 0. | Enter the quantity on each line. |
| … : pick the title; this product needs one. | Click Add Title on that line and pick a title. |
| Pick the customer first; titles belong to a customer. | Choose the customer, then the title. |
| A line has a title but no customer is picked. | Pick the customer. |
| The lines have titles of different customers. | One order is for one customer. Pick the customer, then fix the other titles. |
| Title is … ; product is … . | The title's size or thickness does not match the product. Check you have the right title. |
| The date must be in the financial year … | Choose a date inside the fiscal year. |
| … is already a line. Change its quantity instead. | That product is already on the order. |
| This work order has unsaved changes. Press Cancel again to leave without saving, or Save. | Click Cancel a second time to leave, or save first. |
Change or delete an order
Change an order from the list with the pencil. Once materials have been issued or received, the lines are locked: reverse those documents first. See Issue and receive.