What it is for
Product Master is the list of everything you buy, make, stock or sell. Receipts, issues, orders and recipes all pick their items from it, so create a product here before you use it anywhere else.
A product can have variants: versions of the same item that differ by an attribute, such as a film in different widths. Stock is kept for each variant.
The list
Open Inventory Control, then Product Master under Setup Forms.
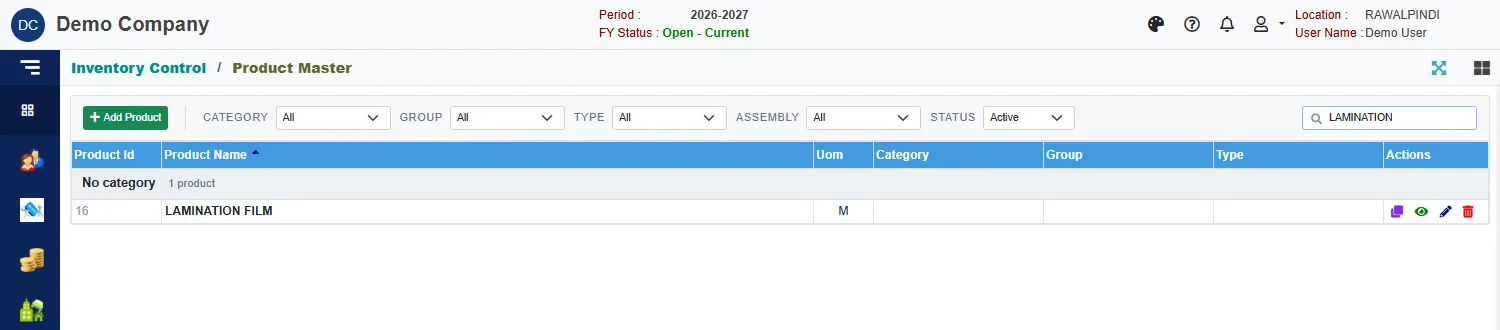
- Use the Category, Group, Type, Assembly and Status filters to narrow the list. Status starts on Active, so products you have switched off are hidden until you pick All.
- Type in the search box to find a product by its id, name, SKU or barcode.
- Products are grouped under their category. Products with no category sit under No category.
- The icons at the end of a row: clone (copy this product), eye (read it), pencil (change it), bin (delete it).
Create a product
- Click the green Add Product.
- Type the Product name. It is the only field you must fill in.
- Pick the Unit and the Class. Inventory is the class for items you keep in stock.
- Tick what applies: Active (the product can be used), Saleable (it can be sold) and Purchasable (it can be bought).
- On the Details tab, set the Category, Group and Type with the search buttons, and the packing (see below).
- Click Save at the top right.
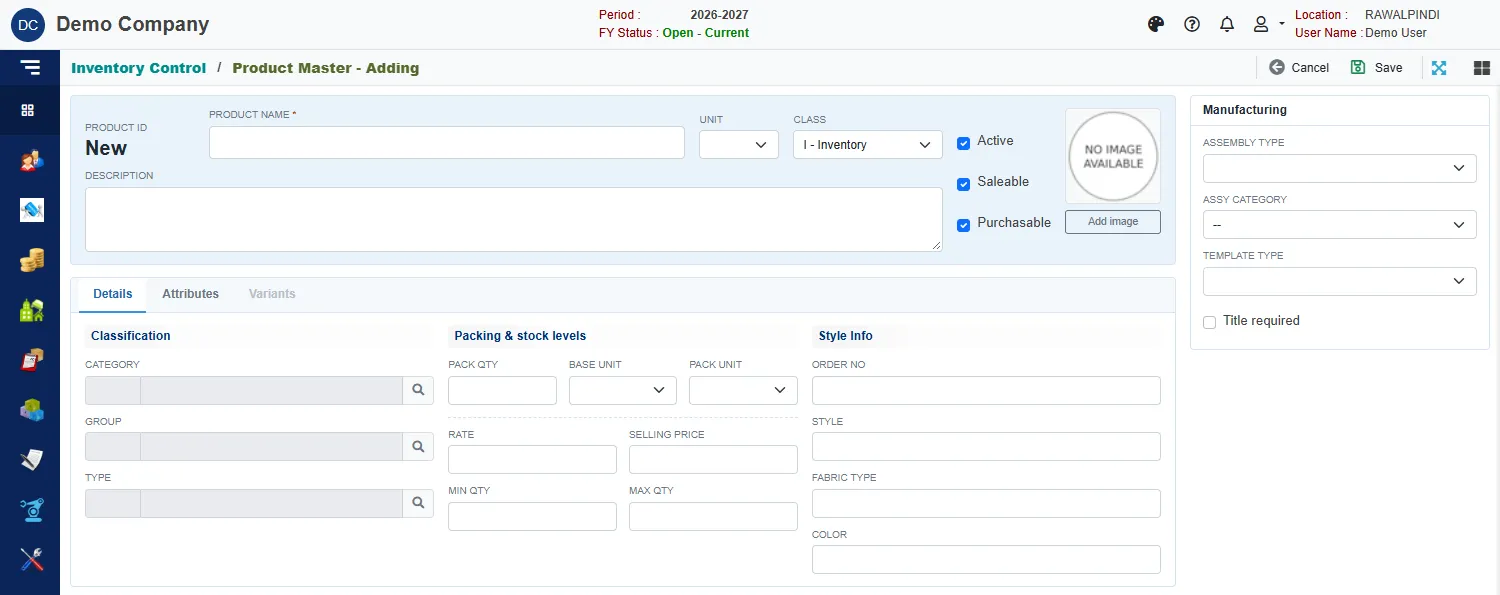
The Attributes and Variants tabs are greyed out until the product is saved. After you save, open the product again to use them.
Create the category, group, type and unit first. See Inventory setup lists.
The top of the form
| Field | What to enter |
|---|---|
| Product Id | Filled in when you save. |
| Product name | Required. Follow the pattern of the products you already have, so lists sort and search well. |
| Unit | The unit you count the product in, for example KG, SHT or NOS. |
| Class | The kind of item, for example Inventory. |
| Description | Optional notes. |
| Add image | Optional picture, shown on pickers. Use a JPEG, PNG, GIF or BMP up to 2 MB. |
The Details tab
| Group | Fields |
|---|---|
| Classification | Category, Group and Type. |
| Packing & stock levels | Pack qty (how many base units are in one pack), Base unit, Pack unit. Receipts and issues can be entered in packs, and the quantity is worked out for you: 2 drums of 50 kg make 100 kg. Rate, Selling price, Min qty and Max qty are optional figures kept on the product. |
| Style Info | Order no, Style, Fabric type and Color, for products that need them. |
The Manufacturing panel
On the right of the form, for products you make:
- Assembly type: Raw for items you buy and use, Assembly for items you make.
- Assy category and Template type: how work orders treat the product.
- Title required: tick when the product is printed per school title. See Titles: from Work Order to stock.
Assembly products also get Manufacturing defaults and Recipe tabs. They are explained in Making a manual recipe.
Attributes
Attributes describe how a product can vary. Open the Attributes tab.
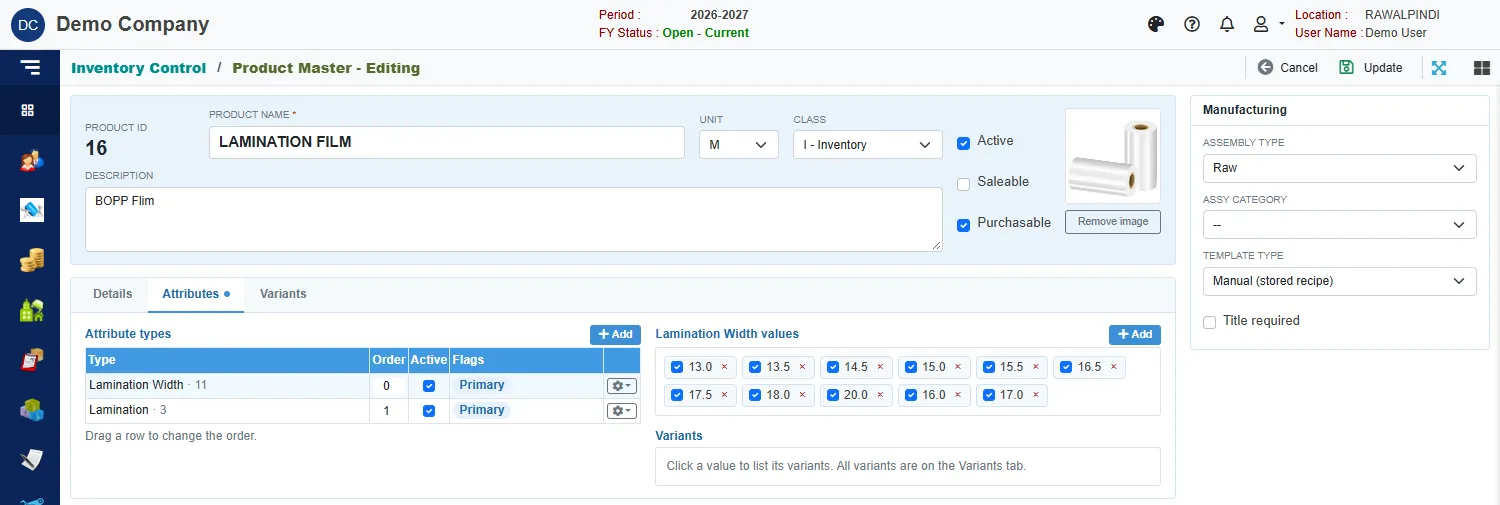
- Attribute types (left): click + Add and pick the kinds of detail this product varies by, for example Lamination Width and Lamination. Tick Active to use a type. Drag a row to change the order.
- Values (right): click a type to see its values, for example 13.0, 13.5, 14.5. Tick the values this product may use, or click + Add to add one.
The types and values come from Inventory setup lists (Product Attributes).
Variants
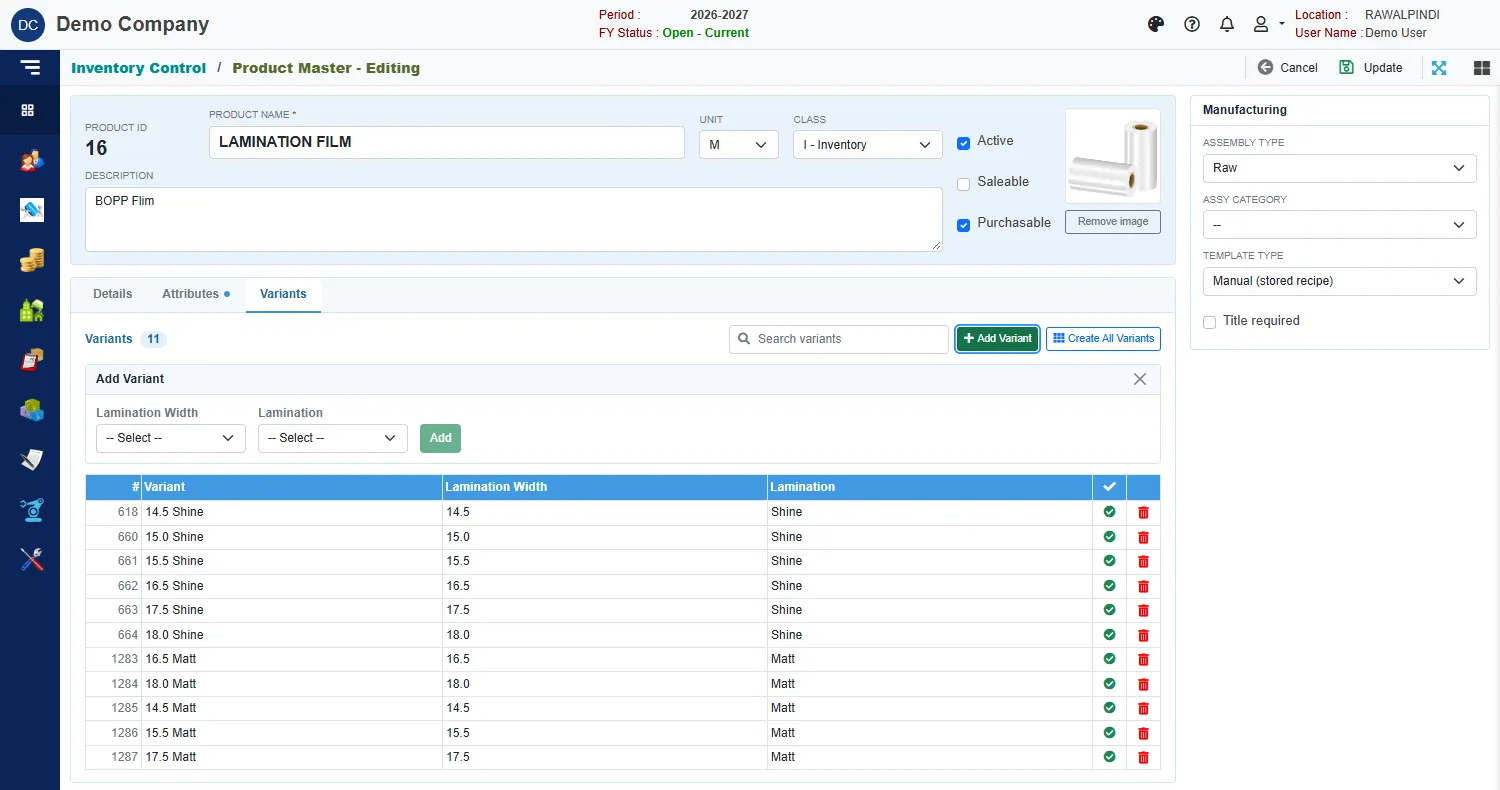
Open the Variants tab to see the variants of the product. Each has a number, a name built from its attribute values, a column for each attribute type, and a green tick when it is active.
Add one variant
Click Add Variant, pick a value for each attribute type, and click Add.
Create all variants
Click Create All Variants to make every combination of the values you tick. The window says how many combinations there are and how many are new:
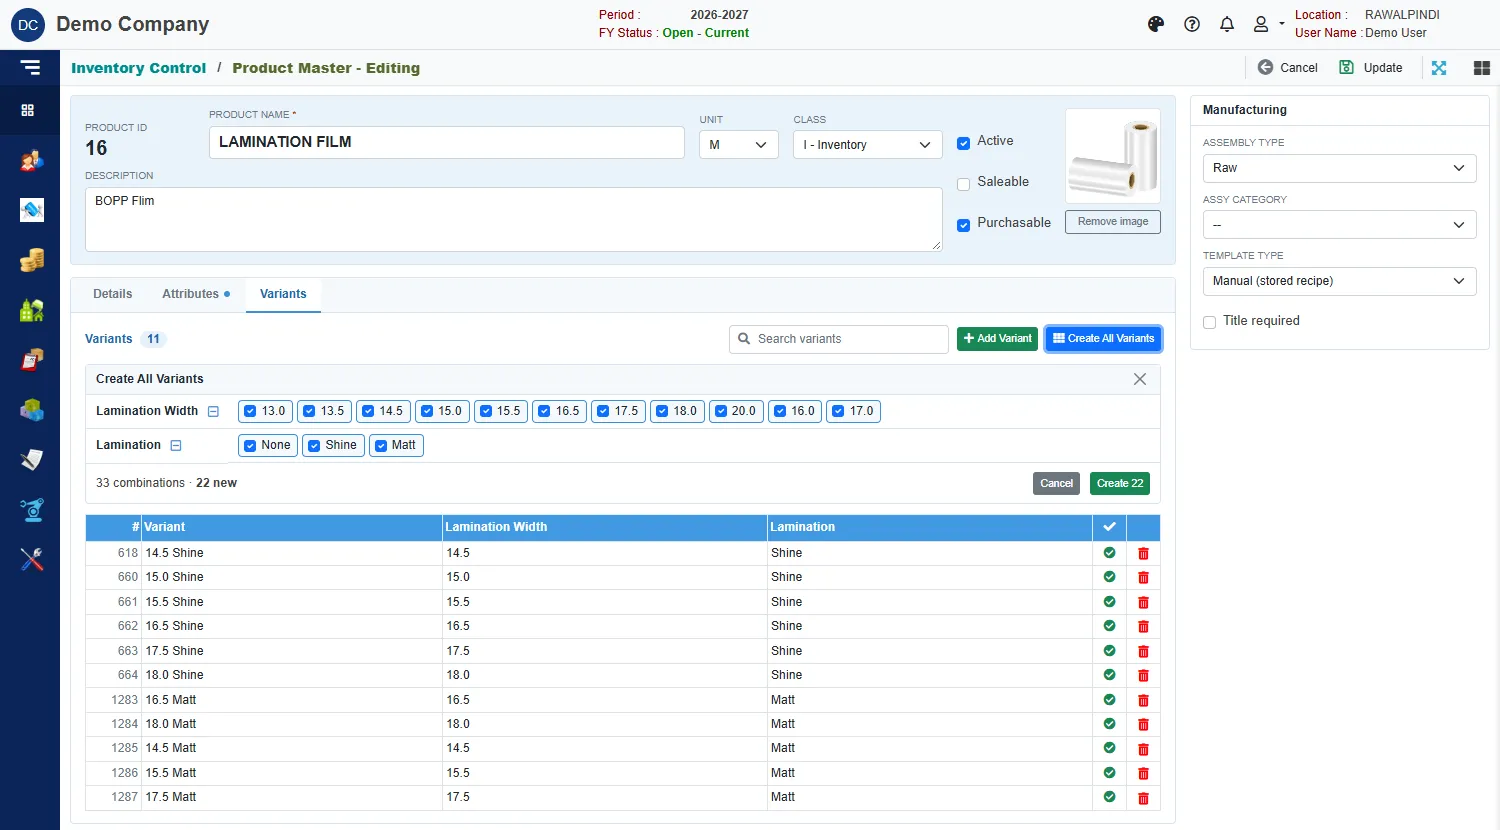
Untick the values you do not want, and click Create (for example Create 22). Combinations that already exist are skipped.
If more than 50 new variants would be created at once, the screen refuses. Untick some values and create the rest in a second round.
Remove or switch off a variant
The red bin deletes a variant that has never been used. If stock or a document uses it, it cannot be deleted: a window lists the documents that use it. A variant that is switched off shows a grey mark instead of the green tick.
Copy a product
Click the clone icon on a row. The form opens with the product's details, attribute types and values copied, and with no variants. Change the name and what differs, then Save.
Delete a product
Click the bin icon. If nothing uses the product, a box asks you to confirm and the product is deleted. If documents use it, a window lists them, and the product stays. Switch the product off with Active instead.
Messages you may see
| Message | What to do |
|---|---|
| Product Name is required | Type a name (at least 2 characters) before you save. |
| File size exceeds 2 MB. | Choose a smaller picture. |
| Invalid file type. Only JPEG, PNG, and GIF are allowed. | Use a JPEG, PNG or GIF picture. |
| Item is already added : … | That attribute type or value is already on the product. |
| Opps! Nothing to save | You have not changed anything. |
Related
- Inventory setup lists holds the categories, groups, types, units and attributes you pick here.
- Making a manual recipe continues from the Manufacturing panel.