What these lists are
Products draw their descriptions from a few short lists. Set these up first, then create products in Product Master. You find them under Setup Forms on the Inventory Control module page.
| List | What it holds | Used for |
|---|---|---|
| Stock Rooms | Your stores | Where stock sits, and which store a user works in |
| Product Category | Main categories, with sub-categories | The widest grouping of products, for example a customer or a kind of goods |
| Product Groups | Groups of products | A narrower grouping, for example NOTE BOOKS or REGISTERS |
| Product Types | Types of product | Another way to tell products apart |
| Product Units | Units of measure | NOS, KG, SHT and so on |
| Product Attributes | Kinds of detail a product can vary by, with their values | The variants of a product, for example size or weight |
All of them work the same way as any list: see Lists (index pages).
Add, change or delete an item
- Open the list and click the green Add button at the top left.
- Fill in the form. A star marks a required field. Product Category, Product Groups, Product Types and Product Units open a small window.
- Click Save.
Use the pencil to change an item and the eye to read it. The bin deletes it.
The bin is greyed out while products use the item. The Products column shows how many do. To remove an item that is in use, move its products to another item first. The Used filter above each list shows only items that are in use, or only those that are not.
Product Category
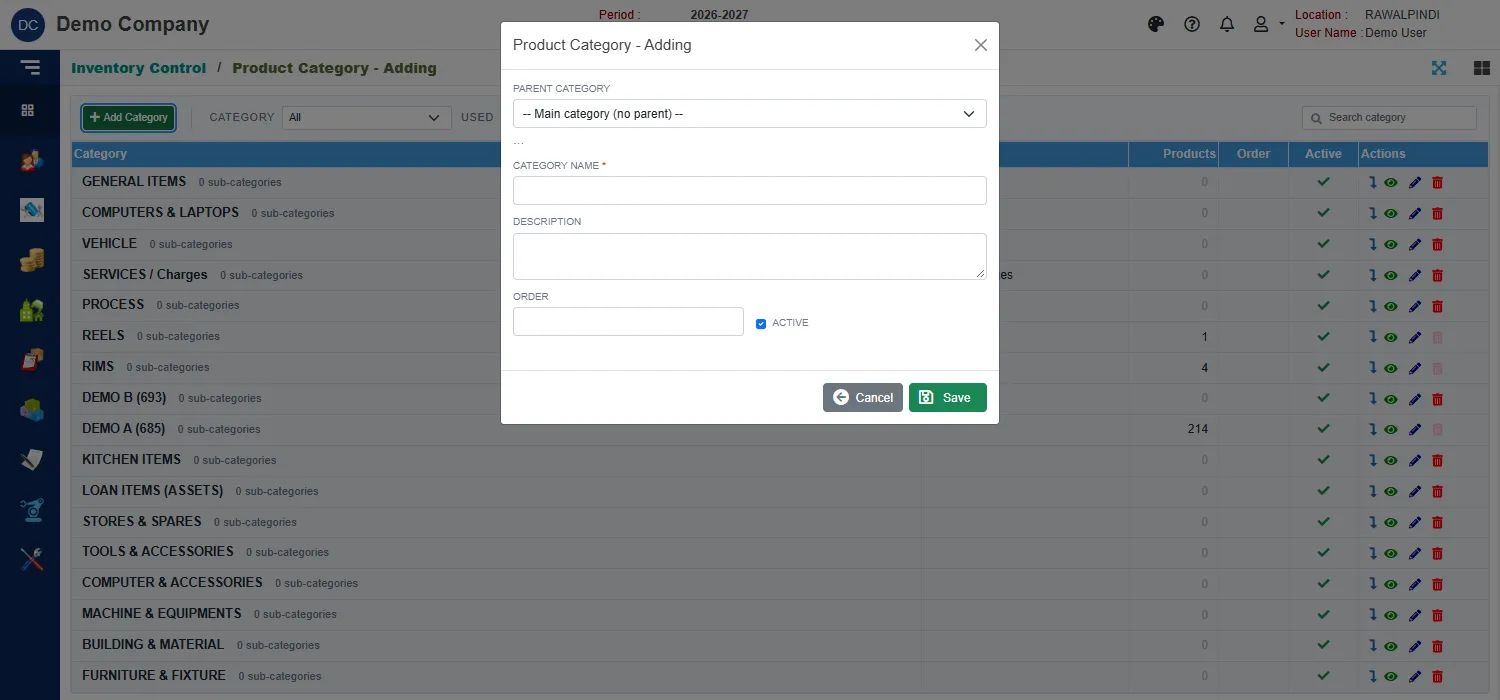
Categories can have sub-categories. In the form:
| Field | What to enter |
|---|---|
| Parent category | Leave on Main category (no parent) for a top-level category, or pick the category this one sits under. |
| Category name | Required. |
| Description | Optional. |
| Order | A number that sets the order in which categories are listed. |
| Active | Untick to stop using the category without deleting it. |
Product Groups
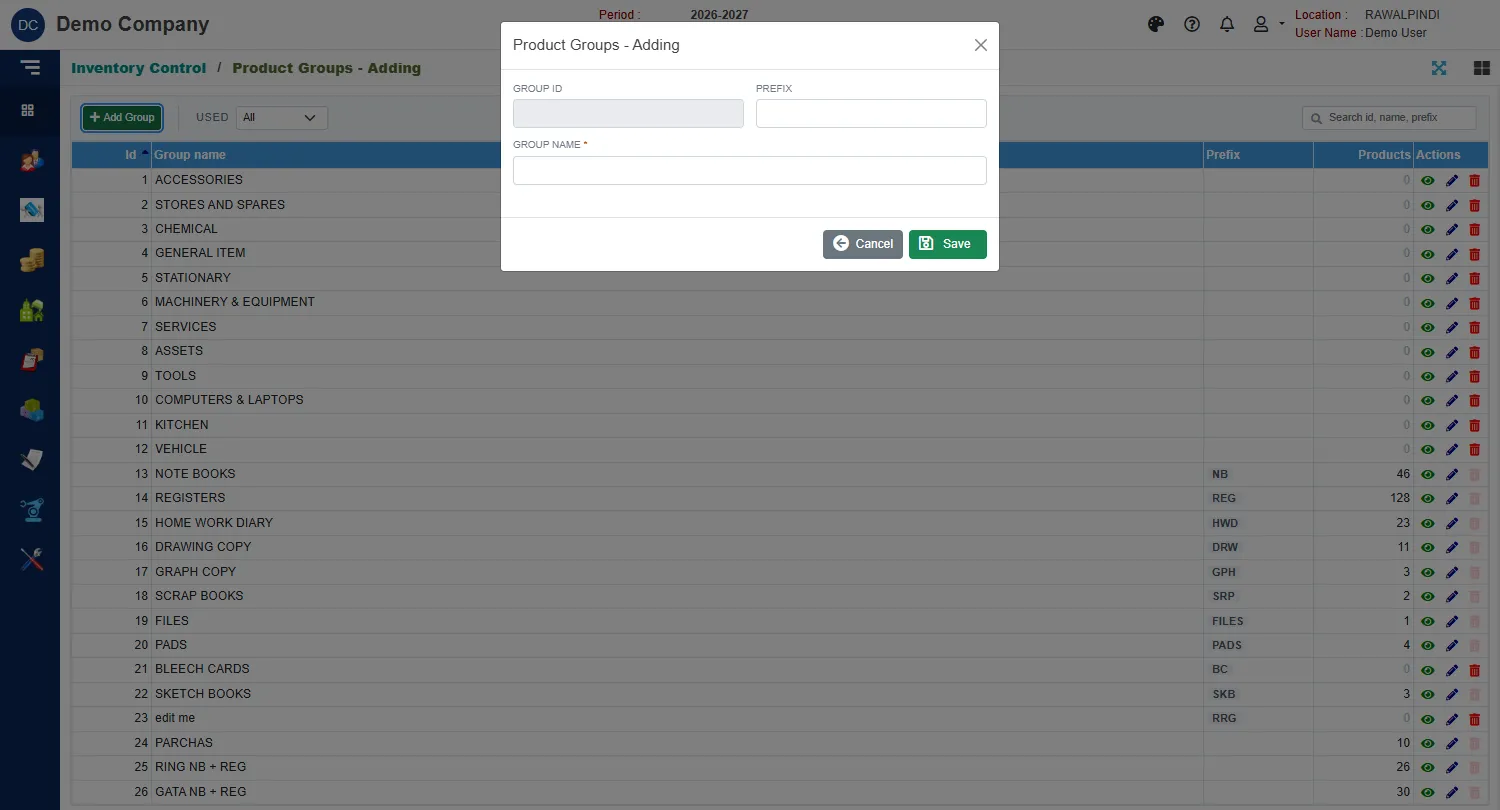
| Field | What to enter |
|---|---|
| Group id | Filled in for you. |
| Prefix | A short code for the group, for example NB for Note Books. |
| Group name | Required. |
Product Types and Product Units
- Product Types has one field, Product type, which is required.
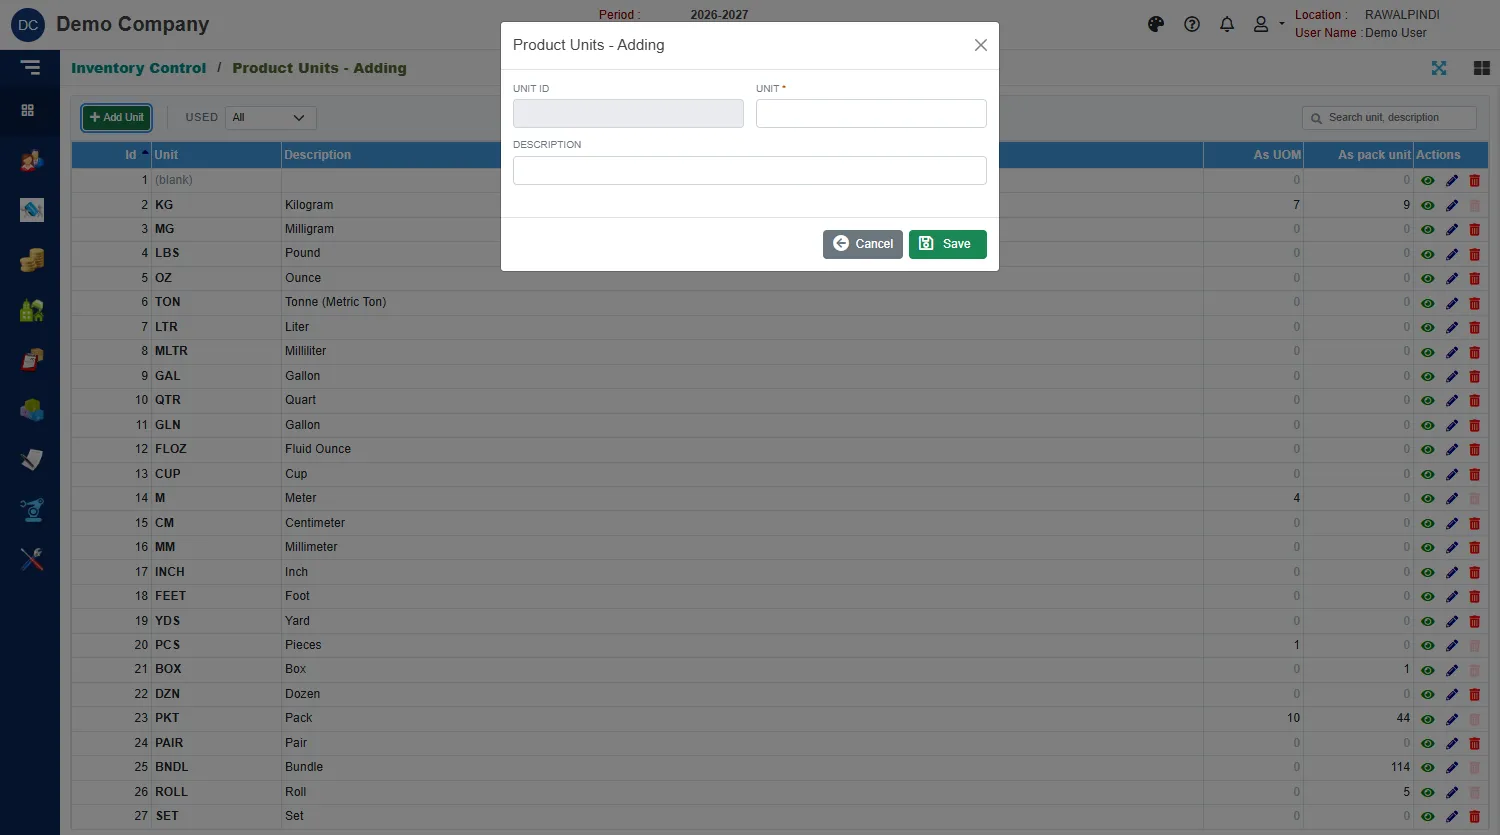
- Product Units has Unit (required), for example
KG, and an optional Description. The list also shows how many products use each unit as their stock unit (As UOM) and as their pack unit (As pack unit).
Product Attributes
An attribute type is a kind of detail, and its attributes are the values. Add the type first, then its values in List of Attributes.
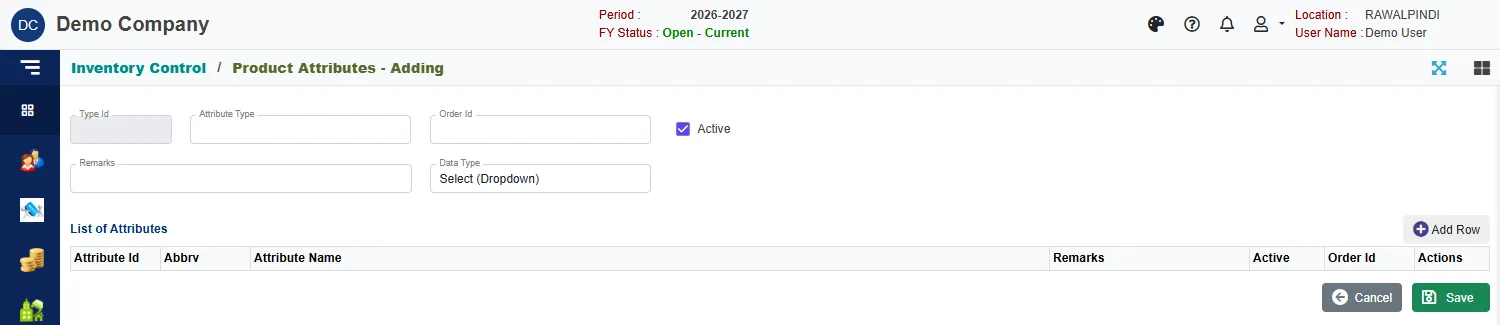
| Field | What to enter |
|---|---|
| Attribute Type | The name of the kind of detail. |
| Order Id | A number that sets the order in which types are shown. |
| Remarks | Optional note. |
| Data Type | How the value is chosen, for example Select (Dropdown). |
| Active | Untick to stop using the type. |
Click Add Row to add a value. Each value has an Abbrv, an Attribute Name, optional Remarks, Active and an Order Id.
Stock Rooms
The list shows each stock room with its Abbreviation, Location, and how many issues and receipts it has had. In the form: Store id, Abbreviation, Stock room (required), Location and Address.

Add Stock Room is available only when your company uses the Multi location option. If the button is greyed out, that option is off.