The employee list
Open Human Resource and click Employee Information.

Each row is one employee: the PNO (the employee number), name, father name, designation, department, mobile, joining date and status. The rows are grouped by status. Use Group by to group them by department instead. Click a column title to sort the rows inside each group.
- The list opens on PRESENT employees. Set Status to All to see the employees who have left as well. They show in grey italics.
- Department, Designation and Type narrow the list further.
- The search box finds a PNO, name, father name, C.N.I.C. or mobile number as you type.
- The list draws up to 500 rows. With more, a line at the bottom tells you to narrow the filters. The filters and search always cover every employee.
On a row, View opens the record read-only, Edit opens it for changes and Delete removes the employee from the list. Double-click a row to open it.
Print: click a row first to print that employee's Employee Information sheet. With no row selected, Print opens the Employee reports page.
Add an employee
- Click the green Add Employee.
- Fill the fields marked with a red star: Employee name, Father name, C.N.I.C., Joining date and Pay scale. If one is missing, Save gives Fill in the required fields (marked *).
- Choose the Department, Designation, Location and Employee type.
- Fill the Pay section and the allowances. See Employee pay, allowances and leaves. An employee needs at least one allowance before the record can be saved.
- Click Save on the bar at the top. The employee gets the next PNO. On an existing employee the button reads Update, and Cancel closes the record without saving.

The top of the record shows the photo, the PNO (New until you save), the name, father name, C.N.I.C. and Status. The line below repeats the designation, department, employee type, location and joining date. The chip on the right shows On payroll, or Salary stopped once the employee has left.
Photo: when you add or edit, click the photo box and choose a picture (PNG, JPG, BMP or GIF). A picture over 1 MB is made smaller for you. The photo is saved with the record.
Personal
Date and place of birth, sex, marital status, mobile, residence phone, e-mail, present and permanent address, religion, N.T.N., passport, driving licence and Referred by. None of them is required, but the reports print them.
Job & Status
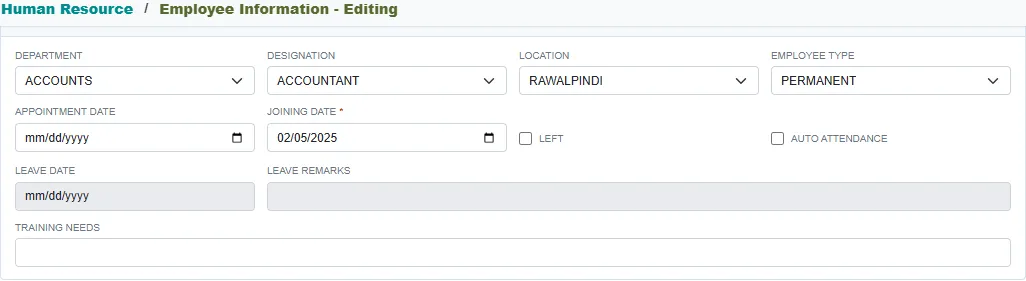
| Field | What it means |
|---|---|
| Department, Designation | Where the employee works. The lists come from the setup lists. |
| Location | The company location the employee belongs to. |
| Employee type | For example permanent or contract. |
| Appointment date | The date on the appointment letter. Not required. |
| Joining date | Required. The employee comes on the payroll from the month of this date. Service length and the leaves worked out from the pay scale start here. |
| Left | Tick it when the employee leaves. See When an employee leaves below. |
| Auto attendance | Tick it for an employee who does not scan on the attendance machine. Payroll then counts the employee as present without scans. Leave it clear for an employee who scans: the payslip needs attendance for the month, and the day's absent list on In/Out shows the employee on a day with no scan. For a new employee the box starts from the Payroll options. |
| Leave date, Leave remarks | Open only when the status is not PRESENT. |
| Training needs | Free text. |
When an employee leaves
Set Status to RESIGNED or TERMINATED, or tick Left (which sets RESIGNED). Both also tick Stop salary. Then fill the Leave date and Leave remarks, and click Save.
- Generate PaySlip lists PRESENT employees. An employee who left keeps appearing for a month in which they still have attendance, so you can pay the last part-month. See Payslips.
- To bring an employee back, set Status to PRESENT or clear Left. The leave date is cleared.
Generate PaySlip goes by the Status, not by the Stop salary box. To keep an employee off the payroll, change the status.
Profile: education, family, experience, courses and skills

The Profile section has five tabs. The number on each tab is the number of rows in it. Add adds a row to the tab that is open.
| Tab | Required | Also |
|---|---|---|
| Education | Qualification, grade or division, From and To | GPA and scale, major subjects, institute, and Highest qualification (a star in the list). |
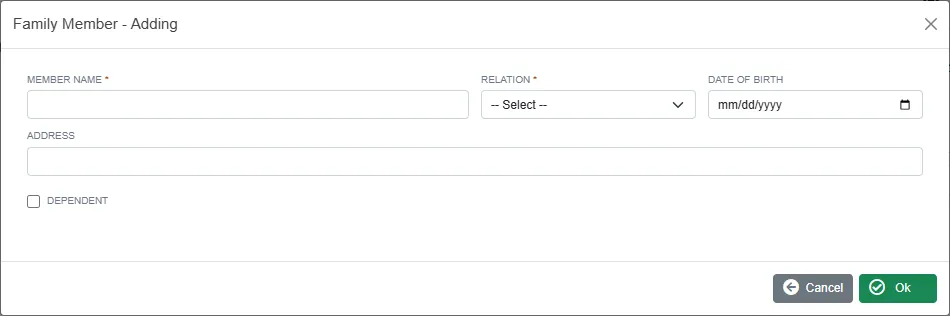
| Family | Member name and relation | Date of birth, address and Dependent. |
| Experience | Employer, job title, From and To | Field of work, salary, leaving reason and remarks. The list shows how long each job lasted. |
| Courses | Course name, From and To | Major or field, institute. |
| Skills | Skill name | Level. |
A From date after the To date gives From date must be on or before the To date. New and changed rows are saved when you Save the employee.
Delete on a row that is already saved removes it straight away, once you confirm, even if you then click Cancel on the employee. The same goes for the allowance, deduction and leave rows.
The side column
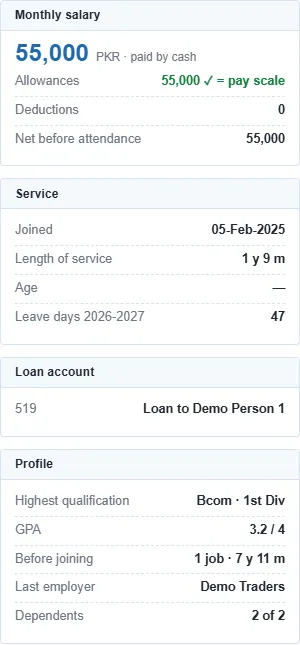
The cards on the right are worked out for you:
| Card | Shows |
|---|---|
| Monthly salary | The pay scale and the payment mode, the total of the allowances (with a tick when it equals the pay scale), the deductions, and the net before attendance. For split pay, the bank and cash parts. |
| Service | Joining date, length of service (or how long the employee served), age, and the leave days of the fiscal year. |
| Loan account | The employee's loan account, once a loan has been issued. See Loans. |
| Profile | Highest qualification and GPA, experience before joining, the last employer and the number of dependents. |
Delete an employee
Click Delete on the row in the list and confirm. The employee leaves the list, and the lists of other screens. Payslips and documents already made for the employee are kept. To record that someone left, set the status instead (see above): the history stays visible on the list.